Hosting Jitsi Meet on AWS
With everyone stuck at home these days I've actually found myself much more closely connected with family than usual. We've been doing more frequent video chats, and including my grandparents in meetings semi-regularly. That's mostly a response to being otherwise isolated, but has been made possible by the existence of simple and reliable group video chat software like Zoom.
Of course Zoom has numerous security flaws, including a recent bug that allowed malware to easily access your webcam. Zoom has also been sharing data with Facebook, seemingly in violation of its own privacy policy. Many government agencies and industries have now banned Zoom, the FBI recently issued a warning about Zoombombing, and some state attorney generals are looking into the company's privacy practices.
We all seem to be stuck using Zoom because it's very easy to use, supports large group meetings, and consistently delivers good call quality. Even for family chats where there are more than two participants, it seems to be the only workable solution. My grandparents are already using it for classes they're involved with, and clicking a single link is all that's required to join a call. Alternatives like Skype or WhatsApp require installing software, and more security conscious options like Signal don't support group calls at all.
Turns out that Jitsi, the old XMPP chat server software, has been quietly improving behind the scenes to enable most of these features with similar ease of use and quality to Zoom, all using open source software and standard WebRTC protocol. At some point the project was bought by a VoIP service called 8X8 who offer to integrate video chat functionality into corporate client software. But they also offer standalone server software called Jitsi Meet. They host a free demo server at https://meet.jit.si which allows you to easily make a meeting room and invite as many people as you'd like with even less hassle than Zoom. No accounts or software installation required. Everything's run from your browser (an app is required on mobile, and the desktop web client only works in Chrome/Chromium browsers, for now).
Using the Jitsi Meet demo server isn't necessarily any more secure than Zoom, as the video is only encrypted between client-server. But the beauty of FOSS software is that you're welcome to set up a self-hosted server that you control, where you can be sure your data is secure.
I decided to set up a server using Amazon EC2, which allows me to start and stop my server on demand, and only pay for the resources I actually use. This setup costs 10.8¢/hr to run, and another 0.5¢/hr ($3.60/mo) when it's not in use to reserve a static IP address. The other cost comes from data transfer fees. Data coming in to AWS services is free. Uploads from EC2 are free for the first 1GB/month, but costs 9¢/GB after that. In my limited testing, it appears that running a Jitsi meeting uses around 250MB/hour/participant. In total, bandwidth costs between 2–3¢/hour/participant.
Overall, I'm very happy with how this is working so far. It seems to have at least comparable call quality to Zoom. Another minor advantage is that the Zoom client on Linux doesn't support virtual backgrounds, so my messy home office is always visible in calls. Jitsi Meet supports blurred backgrounds which is kind of nice.
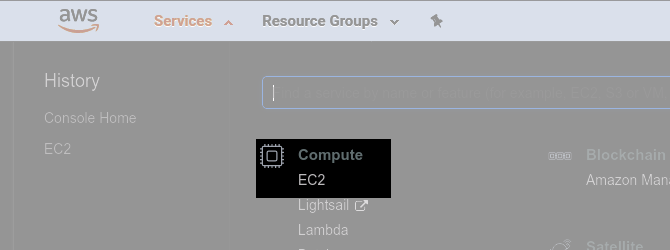
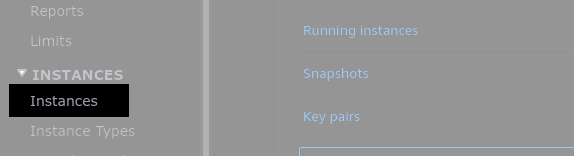
1. Set up an EC2 instance
Jitsi Meet doesn't multiplex video streams (although it does handle adaptive video quality based on each client's connection). Instead, it forwards every video stream to every participant through a "selective forwarding unit" called Jitsi VideoBridge.
That means the server hardware requirements are surprisingly low. In my brief tests, it uses ~15% of one virtual CPU core, a few hundred MB of RAM, and it apparently scales extremely well. Supposedly, it only uses about 20% of a single core when streaming 1,000 meeting attendees. It does, however, require that the VideoBridge server be connected to a reasonably fast network, specifically one with solid upload bandwidth. Because home networks frequently only support low upload rates, you'll probably need a professionally hosted server. AWS is cheap and you only pay for what you use, which makes it a viable solution for a personal Jitsi Meet server.

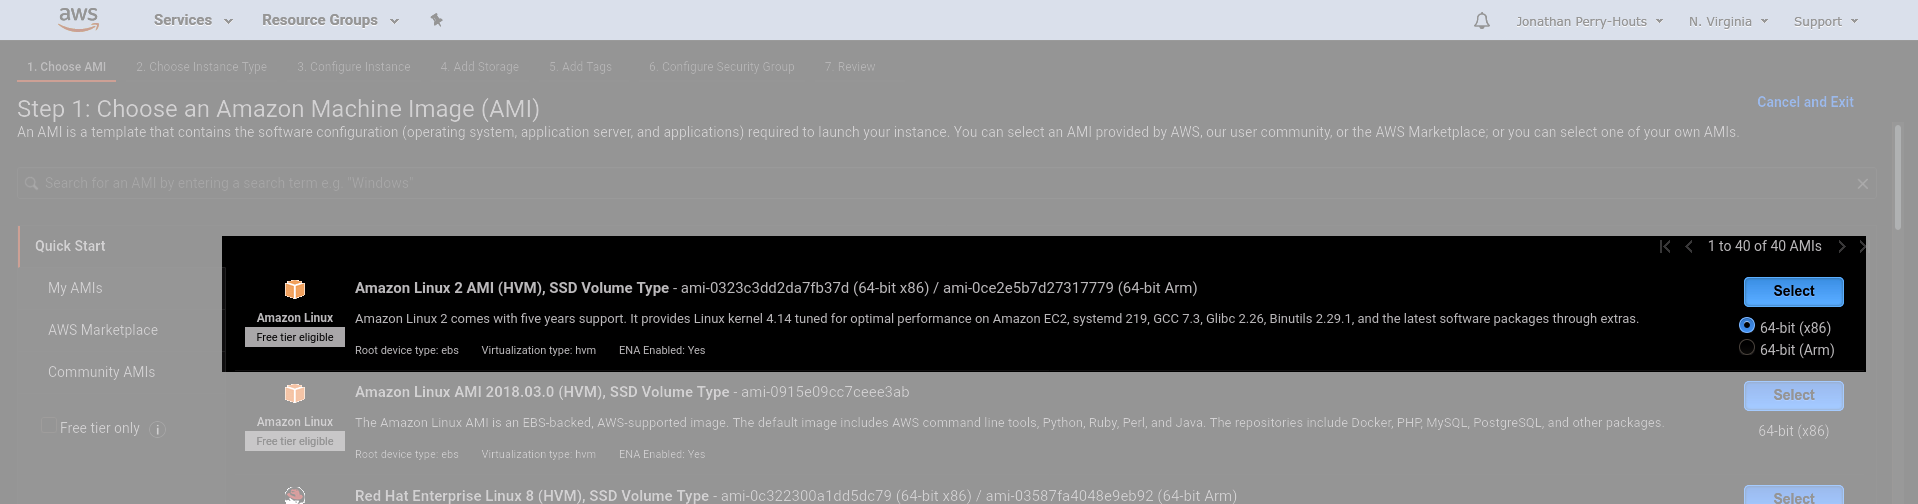
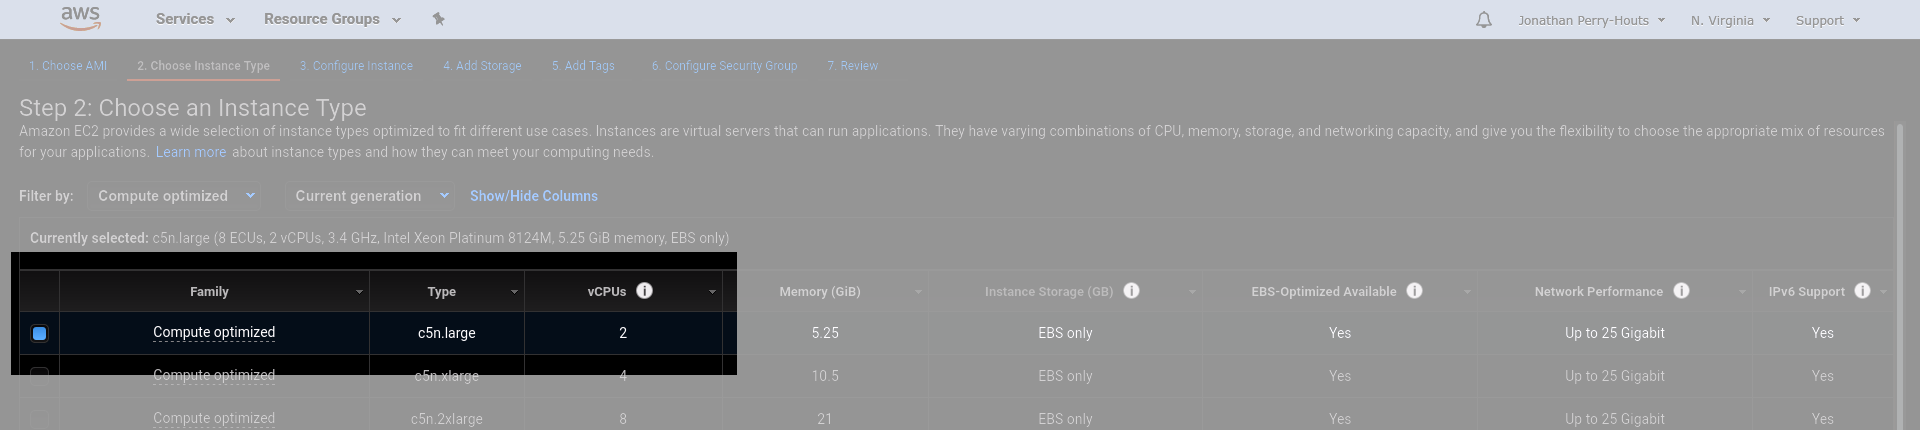
Looking through the specs, it seems that I could use something as small as a t3.micro instance, which is free-tier eligible for the first year after opening an AWS account, then 1.04¢/hr after that (about $7.50/mo). Low cost t3 instances have bandwidth capacity only described in the documentation as "low". That might still be good enough, but since I won't be using this frequently, I figured I could afford to go a little bigger*. I opted for a c5n.large instance, which costs 10.8¢/hr. It has moderate compute performance (2 vCPU's and 5.25 GiB of RAM), but advertises "up to 25 Gigabit" bandwidth**. You can compare the instance types at ec2instances.info.
I used the default configuration for steps 3–5.
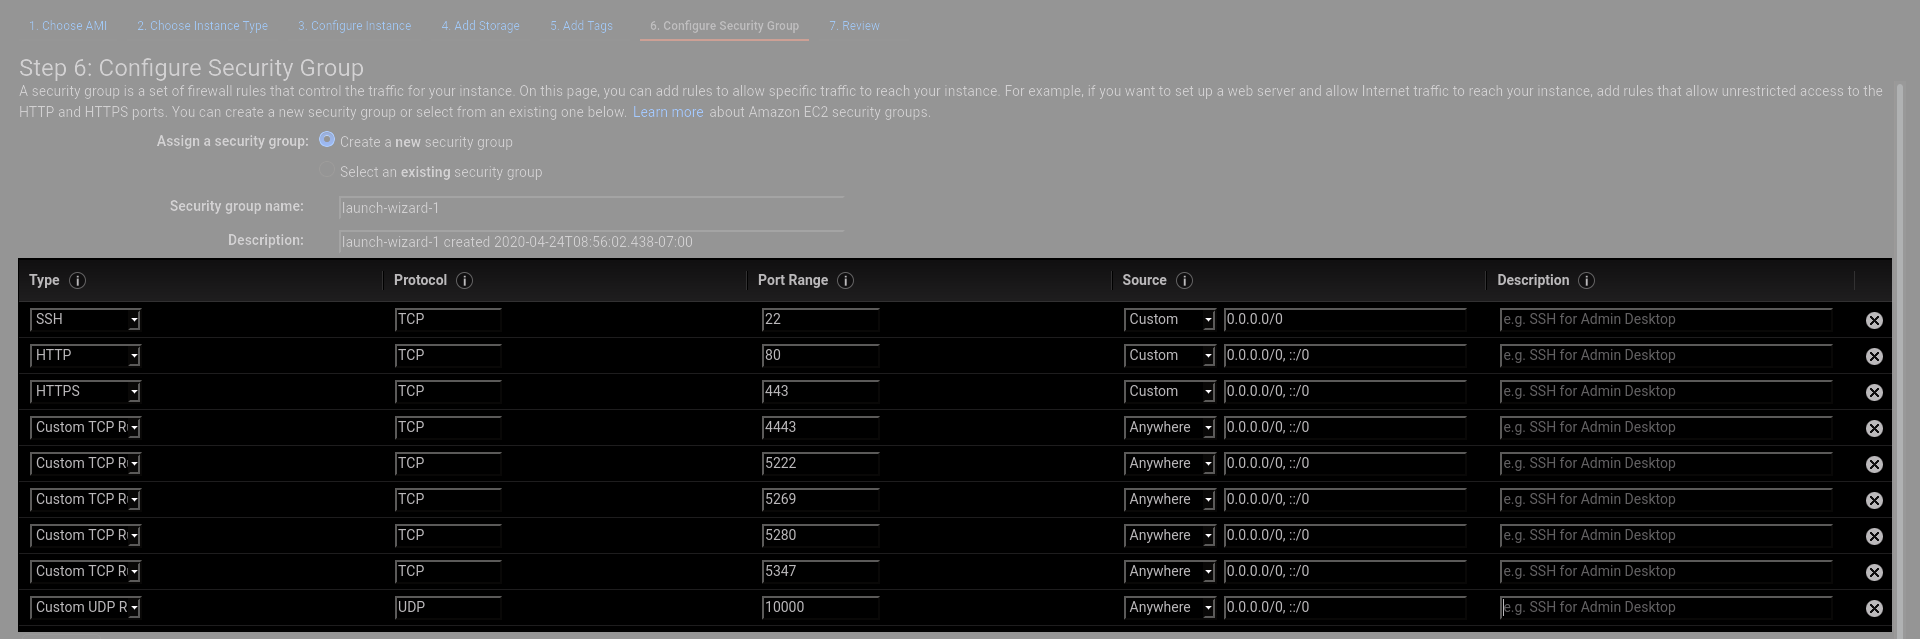
You need to open several ports for Jitsi Meet. The basic HTTP/HTTPS ports of course allow you to access the web interface, but there are other ports used for authentication, and the videobridge server its self. In all, you need to open TCP ports 80, 443, 4443, 5222, 5269, 5280, 5347, and UDP port 10000.
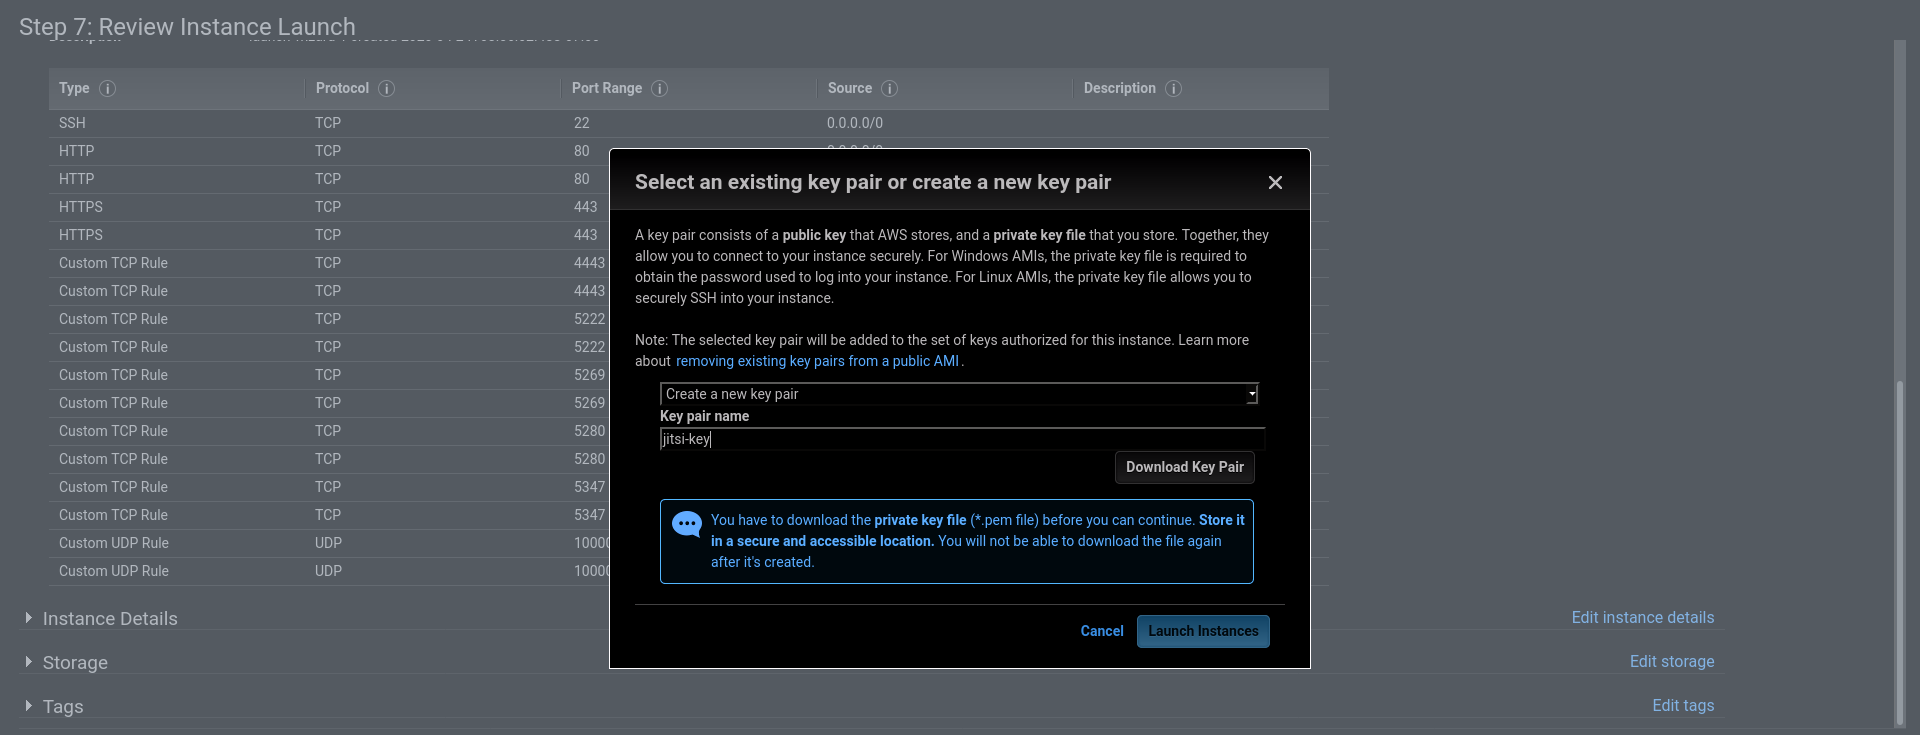
Lastly, you'll need an SSH key pair if you want to connect to your instance via ssh (or even if not, I think AWS will force you to do this).
2. Allocate an Elastic IP address
I want to keep my server in a stopped state most of the time, but I need it to maintain a consistent IP address when I start it back up. In order to do that, I'll need to assign it an Elastic IP. Elastic IP's are free while they're attached to an active instance, but cost 0.5¢/hour during times when the instance is stopped. That still saves money over leaving the instance running all the time, and avoids re-assigning DNS records every time I start the server.
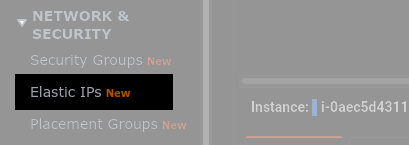
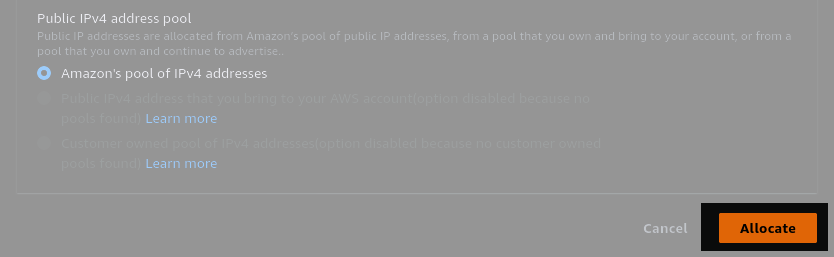
You'll need to "Allocate" a new Elastic IP, and then "Associate" it to your new instance.

Associate the new IP to your instance by selecting it in the list and clicking Actions>Associate Elastic IP address.


3. Assign a DNS record
At this point you can assign a DNS record pointing to your Elastic IP address. This will vary depending on what domain name registrar you're using. The IP address will stay stable from here on out.
4. Connect to the EC2 instance
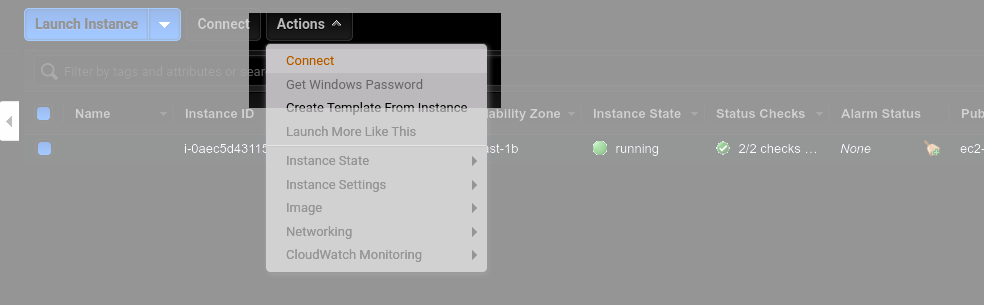
Find instructions for connecting to your new instane by selecting it in the EC2 and clicking Actions>Connect.
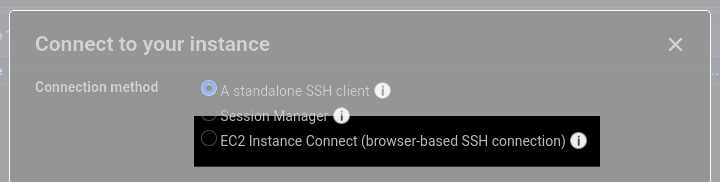
You should really just ssh into your instance, but you can also connect via AWS's browser-based ssh client and complete this entire tutorial without installing anything on your own computer. To do that, choose the EC2 Instance Connect option, with user name ec2-user, then click Connect.
5. Install prerequisites
Most of the heavy lifting here is done in containerized environments via Docker, so the dependencies you'll need to install are minimal. To begin with, you'll need Docker and Git.
sudo yum install docker git
sudo systemctl enable docker
sudo usermod -a -G docker ec2-user
The last line above added ec2-user to the docker group. This change won't take effect until you log out and back in.

You'll also need Docker-Compose. Find the latest version number from the release page. At the time of this writing it's 1.25.5. Replace <VERSION> in the following command with that value, and download it to your instance with
sudo curl -L https://github.com/docker/compose/releases/download/<VERSION>/docker-compose-`uname -s`-`uname -m` -o /usr/local/bin/docker-compose
sudo chmod +x /usr/local/bin/docker-compose
6. Configure the environment
Docker-compose is a set of scripts to help manage multiple docker containers at once. You only need to define some variables and it will take care of the rest.
First, get the docker-compose scripts from the official Jitsi git repository
git clone https://github.com/jitsi/docker-jitsi-meet
We'll start with the included example configuration file, and use the gen-passwords.sh script to automatically generate some secure keys.
cd ~/docker-jitsi-meet
cp env.example .env
mkdir -p ~/.jitsi-meet-cfg/{web/letsencrypt,transcripts,prosody,jicofo,jvb,jigasi,jibri}
./gen-passwords.sh
All of the relevant variables now live in the ~/docker-jitsi-meet/.env file. You can find documentation on all of the environment variables in the docker-jitsi-meet documentation. Open that file with an editor of your choice, and set whatever variables you need.
I left most things at their default values (most of them are commented out by default anyway). The variables I set are HTTP_PORT=80, HTTPS_PORT=443, TZ=UTC, PUBLIC_URL=https://meet.example.com, ENABLE_LETSENCRYPT=1, LETSENCRYPT_DOMAIN=meet.example.com, LETSENCRYPT_EMAIL=admin@example.com, ENABLE_AUTH=0, ENABLE_RECORDING=0, DISABLE_HTTPS=0, ENABLE_HTTP_REDIRECT=1.
7. Start the containers
You can now start all the server software with:
sudo service docker start
cd ~/docker-jitsi-meet
docker-compose up -d
Your server should now be available at the URL you assigned in step 3. If all worked as planned, you should have a valid SSL certificate, and be automatically redirected to the https version of your URL.
8. Manage the services
You can check on the status of your services with
docker ps -a
If you change variables in the .env configuration file, you can stop the Docker services with
cd ~/docker-jitsi-meet
docker-compose down
rm -rf ~/.jitsi-meet-cfg
docker-compose up -d
Configuration files are not updated when you reboot the containers, so if you change variables in ~/docker-jitsi-meet/.env, you also need to remove the ~/.jitsi-meet-cfg directory before restarting the containers for your changes to take effect. You can read more about how to manage docker containers in the documentation.
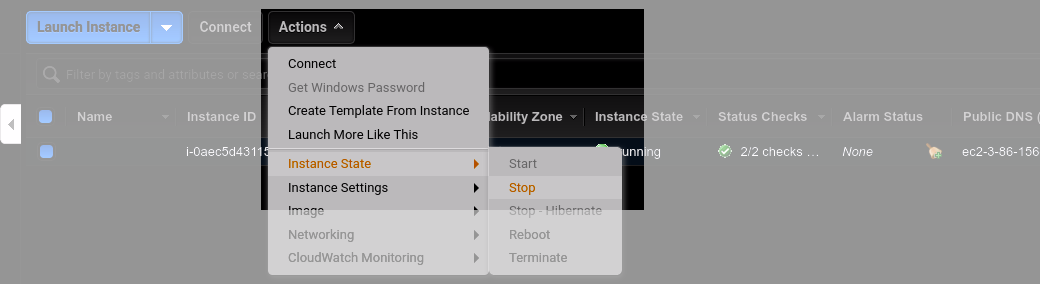
When you're not using the service, you can stop the EC2 instance by selecting it in your EC2 dashboard, and clicking Actions>Instance State>Stop. When you start the instance again (using Actions>Instance State>Start), it will restart all of the docker containers automatically. If you chose to allocate and assign an Elastic IP address, it will remain unchanged after stopping and re-starting. Otherwise you will receive a new IP address and need to change the DNS records for your domain (there's probably a way to do this without an Elastic IP using CNAMES or something, but I'm not going to bother figuring that out).
Note that the first few minutes of video calls on a freshly booted server will be a bit choppy. It takes a while for the VideoBridge service to spin up. You might want to hold a meeting between your laptop and your phone for a little bit before inviting coworkers to join.
* Go big or go home, amirite? Under quarantine I get to go big at home.
** In basic iperf3 tests between instances in different availability zones, it seemed that any individual TCP connection can handle somewhere between 15-150 Mbits/s, and I was never able to get a total bandwidth above about 5 Gbits/s on c5n.large instances. The single-connection bandwidth seems to be about the same on a t3.micro instance, but the total bandwidth maxes out at around 300-400 Mbits/s. They claim that 1000 video streams runs at 20\% of one CPU core with only 550 Mbits/s network traffic. If you try it, I'd be interested to hear about your experience.